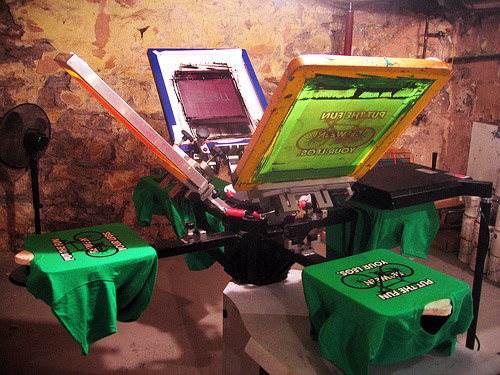
 Designing t-shirts for screenprinting can be fun and exciting, but before you begin creating your t-shirt design, it’s important to understand that designing for print, or 4-color process, and designing for screenprinting require different techniques. Understanding the special requirements for screenprinting and designing your t-shirt following these guidelines will ensure that your t-shirt is printed properly and that your design is not compromised.
Before starting your t-shirt design, you should know a few things about the final product you expect to achieve:
Where is the print going?
In other words, what part of the t-shirt will your design be printed on? This might include the front, the back, the sleeves, or a pocket print. It’s important to understand where your print is going as you’ll need to create the artwork at full-size.
If your design is created using vectors, you can resize as necessary to fit the area of the shirt being printed. But, if you’re designing with raster images, it’s very important that your design be created at the full size that it will be printed.
How many colors, or screens, are being used?
In screen printing, rather than in a 4-color process where four colors; cyan, magenta, yellow, and key black; are mixed in infinite ways to create your image, each color is printed separately using inks that are pre-mixed to the color you’re trying to achieve. The process is called screenprinting, because inks are applied to the t-shirt by being pushed through screens, usually made of silk or a synthetic variation – you may have heard the term silkscreening used as well.
Knowing how many colors you want in your design, or how many screens your printer will allow you to use, will be one of the most important things to keep in mind while creating your design. For example, if you’re designing a t-shirt that will use 3 colors, you must ONLY use the 3 chosen colors in creating your design. You should also keep in mind that these three colors must be solid colors – transparencies or gradients that are commonly used in 4-color process printing are not achievable through standard screenprinting. An experienced designer can produce similar effects by creatively using dots and lines, or halftones. For information about creating halftones for screenprinting, read this article: http://www.gfxsp.com/faq_sp3.html
What are spot colors?
As you now know, your design must be created using a set number of colors. However, it’s important that the colors you work with are spot colors as opposed to mixed colors that are created using CMYK. The easiest way to ensure that you’re only using spot colors, is to choose a Pantone color swatch for each color you plan to use, and delete all other colors from your swatch pallet.
Or, you can create your own spot color, just remember to convert it to spot. If you forget to “flatten†your new color into a single spot color, it will be treated as 4 different colors (cyan, magenta, yellow, and key black) during the color separation process.
What color shirt are you printing on?
When printing on black or dark colored t-shirts, an underprint of white or another very light color is necessary so that all other colors print vividly and true to their shade. In the past, screenprinted t-shirts had a very thick layer of ink applied to keep colors accurate. However, the result was a stiff, almost plastic-feeling texture. Today, thinner layers of ink and new ink formulas have been created to eliminate this thick, plastic feeling of printed t-shirts – but, printing on dark or black t-shirts can be problematic. If the t-shirt you’re designing will be very dark in color, make sure that one of your spot colors is white, so that a thin layer of white ink can be printed beneath all of the other colors in your design, assuring the accuracy and integrity of the other colors used.
How to prepare your final design files.
Now that you’ve created your design, at full size, using the appropriate number of spot colors, it’s time to prepare the files for your screen printer.
- Don’t forget to convert all text to outlines. This is the only way to guarantee that the font prints exactly as it appears on your computer screen.
- Make sure to expand any strokes you’ve used. Different design software applications treat strokes differently. When you expand your strokes, they become a filled object and will not become accidentally altered by your screenprinter’s software. This will also make it easier for you or your printer to separate the stroke color from the color of the object that it surrounds.
- Put each spot color on its own layer. If you’ve followed all of the advice and steps above, it will be quite simple to copy each color and place it on its own layer. Each layer of your artwork represents a screen, or a single color being printed on your t-shirt. This also gives you a great opportunity to double-check your work. Remember, if your shirt is a very dark color, your bottom layer will need to be a completely white version of your entire graphic.
Most of all, have fun!
If you’re already familiar with designing for print or web, adding the knowledge and skills required for screenprint design can open even more opportunities for you as a designer. Be creative, have fun, and keep an eye out – you just might see your design being worn!


